AI hat photography: caps, beanies and bucket hats on a model, without a photoshoot
AI hat photography turns one photo of a hat into a photo of someone wearing it. Upload the hat, choose Lifestyle to have a model wear it with a styled outfit, or Studio for clean product angles with no model in the frame. Caps, beanies, bucket hats, fedoras and wide-brim hats all go through the same flow.
Try it with your own product10 free photos, no card. From $0.33 per day. Photos as low as $0.25 each.
What you can shoot
Caps, beanies, bucket hats, fedoras and wide-brim hats — any headwear you can photograph on a table. The same upload feeds both the worn shot and the studio angles.
A snapback, a dad cap, a ribbed beanie, a slouchy knit, a bucket hat, a felt fedora, a straw wide-brim or a visor all start the same way: one photo of the hat on a plain surface. The mode does not ask you to classify it — it works from the shape in your photo.
The studio angle set is short and deliberate: Front View, Three-Quarter View, Side Profile, Back View and Floating Dynamic — the hat angled in mid-air with no support under it, seen from slightly below so the underside of the brim shows. You can pick up to four in one run, and each one is a separate photo costing one credit.
The lifestyle pose set is built per model gender and covers Front Portrait, Three-Quarter Portrait, Side Profile, Full Body, Hat Touch — the model reaching up to the brim — and Back View. One pose per run here, or switch on Tryly Vision and let it pick the pose for you.
- CapsFront portrait for the logo panel, side profile for the curve of the brim.
- BeaniesWorn shots that show how the slouch and the cuff are styled on a head.
- Bucket hatsThree-quarter portraits and the hat-touch pose that shows the brim shape.
- FedorasSide profile and back view, where the crown and the pinch read clearly.
- Wide-brim hatsFull-body poses that show the brim in a full-body composition.
How it works
Upload the hat photo, pick Lifestyle or Studio, then either choose a model and a pose or choose your studio angles, add a background, review, and generate.
- Upload your hat photo. One photo of the hat on a plain surface, with the whole hat — crown and brim — inside the frame.
- Pick the shot type. Two cards appear under the upload: Lifestyle Shot, a model wearing the hat with a styled outfit, and Studio Shot, product angles with no model in the frame.
- Lifestyle: choose the model, then the pose. Women or men, filtered by hair colour, age, ethnicity, size and style, or your own uploaded model. Then pick one pose — Front Portrait, Three-Quarter Portrait, Side Profile, Full Body, Hat Touch or Back View — or leave Tryly Vision switched on and let it pick the pose for the hat.
- Studio: choose up to four angles. Front, three-quarter, side profile, back and the floating shot. Tick up to four; each is a separate photo and costs one credit, and the counter beside the heading shows the running total.
- Background, review, create. Studio, outdoor, lifestyle and abstract backgrounds sit in tabs, and you can save your own. The review step lists every choice and the credit cost before anything is spent, then the finished photos land in your gallery to check and download.
On a model or on its own
Both. Studio mode is product photography with no model in the frame — front, three-quarter, side, back and a floating shot. Lifestyle mode puts the hat on a model with a styled outfit.
The studio angles are what a catalogue page needs: the same hat from four consistent viewpoints, on a clean background, with nothing else in the frame. The floating angle is the one people miss — the hat suspended with no head and no stand, seen from slightly below so the underside of the brim is visible, which is otherwise a fiddly job with fishing line and retouching.
The lifestyle poses answer the question the studio shots cannot: how does it look on a head? The hat-touch pose, where the model reaches up to the brim, draws the eye to it, and the full-body pose shows the brim in a full-body composition. Neither is a measurement — list the crown height and brim width beside the image if fit matters to the sale.
Because both paths start from one upload, the practical split is the studio angles for the product page and one lifestyle pose for the top of the listing and for social.
Which shots to run for each kind of hat
The angle and pose names are the ones in the app; the last column is what to look at in the result.
| Hat | Studio angles | Lifestyle pose | What to check in the result |
|---|---|---|---|
| Cap | Front View, Side Profile | Front Portrait | Front-panel logo letter by letter; the curve of the brim |
| Beanie | Front View, Back View | Front Portrait, Back View | Rib and cuff texture; where the cuff sits |
| Bucket hat | Three-Quarter View, Floating Dynamic | Hat Touch | Brim width all the way round; the underside on the floating shot |
| Fedora | Side Profile, Back View | Three-Quarter Portrait | Crown pinch and band; felt texture |
| Wide-brim hat | Floating Dynamic, Side Profile | Full Body | Brim shape and any flop; state the brim width in the listing |
There is no separate brim-underside angle; Floating Dynamic is the studio shot that shows the underside. Up to four studio angles per run, one credit each; one lifestyle pose per run.
How the shots are laid out
One source photo, then a worn pose and a studio angle.
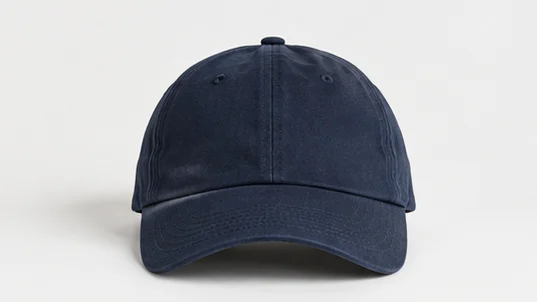
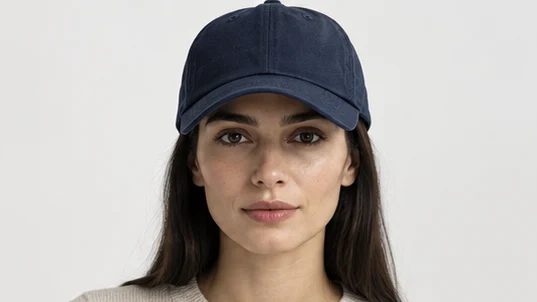
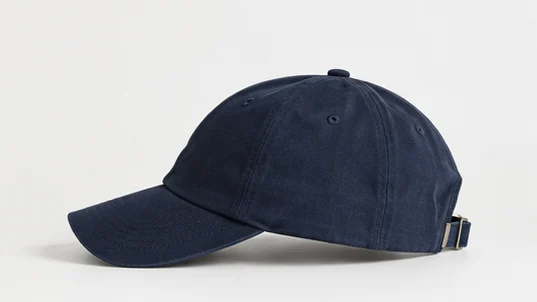
Cap: worn front portrait, studio side profile
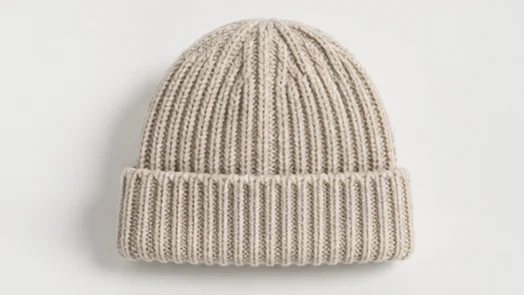
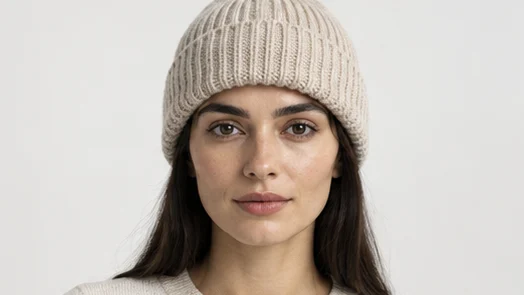
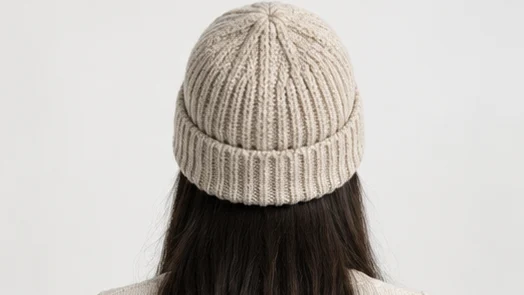
Beanie: worn front and back
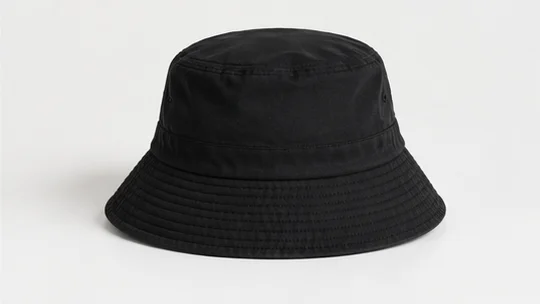
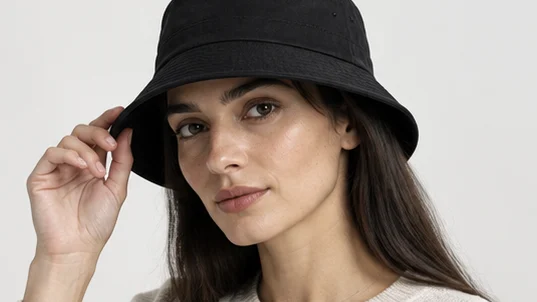
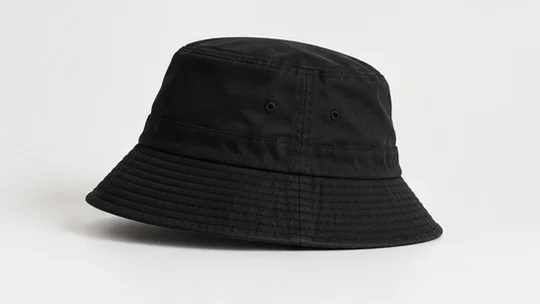
Bucket hat: hat-touch pose, studio side view
What your photo needs
One clear photo of the hat on a plain background, with the whole hat inside the frame. A phone camera in daylight is enough.
Sit the hat on a plain surface with nothing else in the picture, shaped the way you want it to be worn — crown up, brim curved the way you sell it. A beanie squashed flat reads as flat, and a cap photographed brim-down loses the curve. Nothing should run off the edge of the frame.
Even light beats a hard flash. A hard shadow inside the crown reads as a hole, and a glare across a satin or waxed finish can come back as a smear, so turn the hat away from the window rather than into it.
A good source photo of a hat
What to get right before you upload — the worn shape and the studio angles are built from the shape your photo shows.
- The whole hat in frame, crown and brim, nothing cropped.
- Shaped as it is worn: crown up, brim curved the way you sell it, a beanie with its cuff folded as intended.
- Front panel facing the camera, with the logo or embroidery sharp and in focus.
- A plain surface and background; something inside the crown to hold the shape is fine as long as it is hidden.
- Even light with no hard shadow inside the crown and no glare on satin, waxed or straw finishes.
- Texture in focus — rib, weave or felt nap — rather than blurred.
- A second photo of the back or the side if a label or design sits there.
On the file itself the requirements are loose. JPG, PNG, WebP, HEIC, HEIF and AVIF are all accepted, up to 50 MB per image. Anything under roughly 1024 pixels on its shortest edge still uploads, but you are warned that a higher-quality photo gives a better result, because detail the input never captured cannot be invented later.
Where it struggles
Front-panel branding is the detail to check most closely. Embroidered logos, printed slogans and woven labels can come back subtly changed, and knit texture can flatten.
A cap is mostly a logo, so the front panel is where to look first. Embroidered wordmarks, small text on a bucket hat and woven labels on a beanie cuff can come back with a letter reshaped or the spacing off. The smaller the lettering, the closer you should look — check it before you publish.
Texture next. Ribbed knits, cable patterns, straw weave and felt nap can lose definition or be rebuilt slightly differently, which matters when the texture is the reason the hat costs what it costs. Very floppy or unusually shaped brims can also be reshaped subtly.
On the worn shots, hair is a live variable: the way hair falls around a beanie or under a cap is generated, not copied from your photo, so it can vary between runs on the same model.
Exact colour is not guaranteed either. Each attempt costs a credit, including the ones you throw away — so run your most heavily branded cap first on the free photos.
Check before you publish
Compare the finished photo with your source photo at full size. These are the details to inspect on a hat.
- Front-panel branding: every letter of an embroidered or printed logo, and the stitch texture around it.
- Brim: width, curve and edge binding match the hat; on a floating shot, the underside too.
- Crown: height, panel count, eyelets and the button on a cap.
- Texture: rib, cable, straw weave or felt nap still reads as the material.
- Colour against the real hat in daylight.
- On a worn shot: the hat sits on the head at a plausible angle, and the hair — which is generated — looks natural with it.
- Scale: a worn shot shows styling, not size — put the circumference and brim width in the listing.
Open the finished photo at full size rather than judging the thumbnail. If a detail is wrong, regenerate that photo; a retry costs one credit, the same as the first attempt.
Choosing the model
500+ models to pick from, or upload your own model or yourself. The model step is the same in every mode: filter the library, or add your own person once and use them for the whole catalogue.
Switch between women and men, then narrow the library by hair colour, age, ethnicity, size and style until you have the face that fits your brand. Heart the ones you keep coming back to and they sort to the front next time.
If you would rather use a real person, “Add Your Model” takes a photo of your own model — or of yourself — and your hats are photographed on them instead. The same library powers the AI clothing model library, so clothing and accessories can share one face across a whole store.
What it costs
From $0.33 per day. Photos as low as $0.25 each.
$0.33 per day is the Starter plan billed annually — $119.97 a year for 300 photos. $0.25 each is the Max annual 10,000-credit pack at $2,499.99 a year.
Billed monthly, Starter is $20 for the default 25-credit pack, $35 for 50 credits or $55 for 100 credits.
10 free photos, no card.
One credit is one photo, and the review step shows the credit cost before anything is spent. Retries cost a credit too, including the attempts you throw away, which is the honest reason to run your hardest hat first on the free photos.
Questions hat sellers ask
The questions hat sellers ask most, answered against what the product actually does today.
Can I show the hat being worn without hiring a model?+
Yes. Lifestyle mode puts the hat on a model from the library — or on your own uploaded model — with a styled outfit, and you choose the pose: Front Portrait, Three-Quarter Portrait, Side Profile, Full Body, Hat Touch or Back View.
Can I get the hat on its own, with no head in it?+
Yes. Studio mode is product photography with no model in the frame: Front View, Three-Quarter View, Side Profile, Back View and Floating Dynamic, where the hat hangs in the frame with nothing under it.
How many hat photos does one run make?+
In Studio mode you can select up to four angles and each comes back as a separate photo costing one credit. In Lifestyle mode it is one pose, one photo, one credit per run.
Will an embroidered logo come out right?+
Check it every time. Embroidered wordmarks and small printed text are the details to inspect at full resolution, and small lettering can change. Open the finished photo and look at the front panel up close before you publish.
Can it pick the pose for me?+
Yes. In Lifestyle mode there is a Tryly Vision switch that lets the AI pick the pose for your hat instead of choosing one yourself; it is switched on for you when you choose Lifestyle.
Does it work for wide-brim and straw hats?+
Yes, with one caveat: straw weave and felt nap can lose definition, and very floppy brims can be reshaped slightly. The Full Body pose shows the brim in a full-body composition, and the Floating Dynamic studio angle shows its underside. State the brim width in the listing, and test yours on the 10 free photos.
Can I use the hat photos on Shopify, and do they meet its image limits?+
Photos made on a paid plan can be used on your store, in ads and on social media. Shopify's own documentation says product images can be any size up to 5000 × 5000 px or 25 megapixels, must have a file size smaller than 20 MB, and that 2048 × 2048 px usually displays best for square product images, with a consistent aspect ratio across your main images (https://help.shopify.com/en/manual/products/product-media/product-media-types, checked 17 September 2026). Check the pixel size of the file you download against that before you upload it. Amazon and Etsy publish their own image rules for sellers; read them in your seller account before you list.
What does a traditional hat shoot cost?+
Shopify's product photography pricing guide (Shopify Staff, published 27 January 2026, https://www.shopify.com/blog/product-photography-pricing) puts product photographers at $500 to $3,000 per day, with per-image pricing between $50 and $350. Those are general product-photography rates, not hat-specific ones. On Tryly one credit is one photo. $0.33 per day is the Starter plan billed annually — $119.97 a year for 300 photos. $0.25 each is the Max annual 10,000-credit pack at $2,499.99 a year. Billed monthly, Starter is $20 for the default 25-credit pack, $35 for 50 credits or $55 for 100 credits. A worked budget for a whole collection is at tryly.ai/blog/true-cost-of-fashion-photoshoots.
Sources
The only outside figures on this page come from the pages below, fetched on the date shown. Product facts come from the app itself.
- Shopify Help Center, "Product media types" — image size limits and the recommended size (checked 17 September 2026)
- Shopify, "Product Photography Pricing Factors: How Much Photos Cost (2026)", Shopify Staff (published 27 January 2026, checked 17 September 2026)
Other things you can photograph this way
The same upload-and-generate flow covers bags, jewellery, shoes, hats and watches, each with its own angles and poses.
- AI bag photography for handbags, totes and crossbody bagsHandbags, totes, shoulder bags, crossbody bags, clutches and backpacks on a model.
- AI jewelry photography for necklaces, earrings and ringsNecklaces, pendants, chains, earrings, bracelets and rings worn and shot close up.
- AI shoe photography for sneakers, heels and bootsSneakers, heels, boots, sandals, loafers and flats, on foot or as studio product shots.
- AI watch photography for wristwatches, smartwatches and dress watchesWristwatches, smartwatches, dress watches and chronographs on a wrist or on a surface.
- On-model photography for a whole clothing collectionTen garments on one AI model, flat photo to on-model to close-up.
- Ghost mannequin photos for clothingA garment holding a worn shape with no model, mannequin or hanger in the frame.
10 free photos, no card. From $0.33 per day. Photos as low as $0.25 each.
$0.33 per day is the Starter plan billed annually — $119.97 a year for 300 photos. $0.25 each is the Max annual 10,000-credit pack at $2,499.99 a year.
Try it with your own product